CNC busbar equipment is a special machine for processing busbars, widely use in high and low voltage complete set, switchgear, substation, bus duct, bridge, electrical switch, communication equipment, household appliances, shipbuilding, office automation equipment, elevator manufacturing, chassis cabinet manufacturing and other electrical complete sets of manufacturing industries.
CNC busbar punching machine is a kind of supporting equipment designed for improving work efficiency and ensuring operation safety by referring to foreign advanced products and combining with domestic practice. It is most suitable for the construction site of the large-scale electric control box and power transmission and distribution construction project.

How to use the CNC busbar punching machine?
(1) on: turn on the main power supply of the CNC busbar punching machine, turn on the main power supply in the electrical cabinet, start the computer host, turn on the emergency stop button to start the display screen, start the hydraulic station, and make sure that there are no residual materials and other irrelevant people or articles within the working range of the machine, and then the machine self-checks.
(2) maintenance: lubricate and clean all parts in strict accordance with the instructions.
(3) preheating: preheat as required before each shift.
2. Replace the mold.
(1) turn the touch screen to manual state and select the manual control screen.
(2) click the x-axis on the touch screen to adjust it to more than 300 in the forward direction, and then manually pull out the Vice Clamp away from the working position.
(3) click the up button of punching cylinder and shearing pressure cylinder on the touch screen to the maximum. Note: never press the down button.
(4) click the y-axis on the touch screen, press the positive direction to adjust to the maximum value, that is, move the mold base to the outermost working position.
Remove the y-axis outer cover, manually screw open the two screws on the side of the carrier, unfold the bracket, pull down the outermost part of the mold base, and replace the required mold (including the upper mold and the lower mold).
Note: when replacing the punching lower die, the top thread must be tightened, then push the mold back, close the bracket, and tighten the two screws on the side of the support bracket. When replacing the long die, the upper and lower openings of the mold must be consistent Change the return sleeve according to the punch size.
(1) on the touch screen: the punch size can be changed by selecting the setting of die parameters. Specific operation: select "die parameter" setting, click the punch parameter to be replaced, input the actual value, and press enters to confirm.
(2) on the computer: open the software, first select the "mold" button, click "Upload" at the bottom right of the mold page, then change the required mold parameters and tick in front of the required mold, click "download" to prompt for password input and confirm.
Note: the selected mold parameter size must be consistent with the actual mold size.
1. Program compilation
(1) confirm that the workpiece parameters and mold parameters input in "engineering parameters" are consistent with the actual ones to be used.
(2) draw the drawing of the machined parts, open the "project deployment" screen to determine the processing length and whether the processed parts are correct, click "punching and shearing code", input the number of prompted processing pieces and confirm, after the simulation operation, click "execute", execute the code, and download the code.
Note: you must simulate the operation before downloading the code.

2. Workflow
(1) After the working drawing is finished, click project development, code cutting, confirm, execute, confirm, program download.
(2) turn the touch screen to automatic and start according to the program.
Note: Before working, make sure that there are no irrelevant materials and personnel in the working range.
(3) put it into the busbar and put the auxiliary clamp at the specified position (- 70 position).
(4) step on the footswitch or press the pause button to start the CNC busbar punching machine
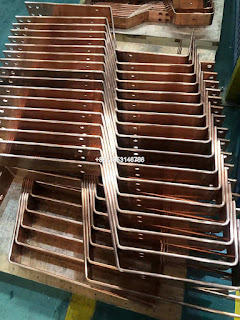
(5) When the machine stops automatically, a copper bar is finished.
Note: (1) both footswitch and pause button have pause function to start and pause cycle.
(2) if it stops midway, you must first press the stop key, and then turn the touch screen to the manual state.
Select the manual control screen to make the punching cylinder go up and the shear pressure cylinder goes up. The main clamp is released and the drag belt is started. Then the copper bus bar in the servo CNC busbar punch can be taken out.
评论
发表评论